


Quick fixes for Missing Component error in QuickBooks Desktop
Here are some quick solutions you can try to implement, and resolve QuickBooks PDF Component Missing Error.
Solution 1: Update QuickBooks Desktop
- Firstly, you need to run QuickBooks as an Admin.
- After that go to Help menu and select Update QuickBooks Desktop.
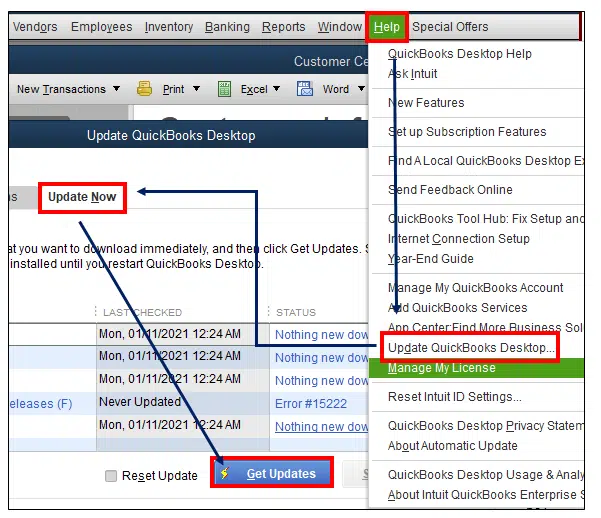
- Now, choose the checkmark beside Reset Updates.
- Also, choose Get updates.
- This will initiate the download process. Once done, restart QuickBooks.
Method 2: Run QuickBooks Print & Print Repair Tool from QuickBooks Tool hub
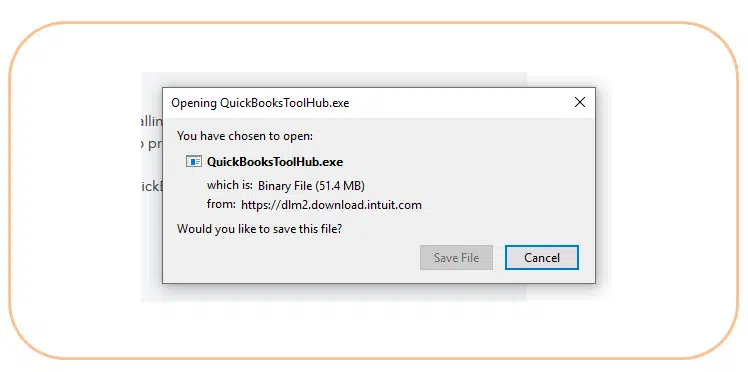
Step 1: Download and install the QuickBooks Tool hub
QuickBooks tool hub is a one-stop solution for all your QuickBooks error resolutions. Here you will find all sorts of tools you need to deal with various errors in QuickBooks. Proceed with the steps below for the best experience and also use Tool Hub on Windows 10, 64-bit.
- To begin with, close QuickBooks.
- Later on, download the most recent version of the QuickBooks tool hub.
- Save the file at a place where you can access it.
- Now, if you already have a tool hub, then find out which version you are using.
- Open the downloaded file and perform the onscreen steps.
- Agree to the Terms and conditions.
- After the installation process ends, double-click the icon on Windows.
Step 2: Run QuickBooks PDF and Print repair tool
- Once you are able to access the tool hub, it is time to choose Program problems in the QuickBooks tool hub.
- Select the QuickBooks pdf and print repair tool.
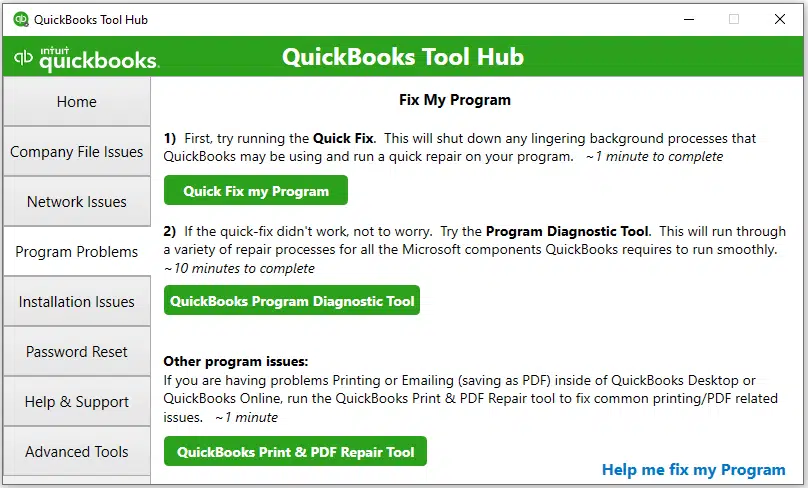
- This can take a minute or so.
- Now, print, email, or save the PDF from QuickBooks again and check if the issue continues.
Read it Also: How to Issue Customer Refund in QuickBooks?
Method 3: Update the Print Spooler Service Properties
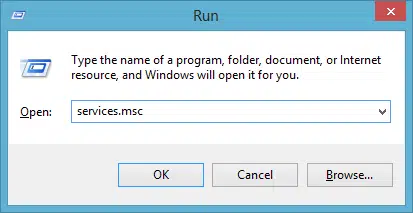
- Under this process, you simply have to right-click the Start tab and choose Run.
- Now, enter in services.msc and click on the OK tab.
- After that, search for Print spooler service.
- The next step is to right-click the Print spooler service.
- Choose the Properties tab.
- And then, head to the Startup type and choose Automatic.
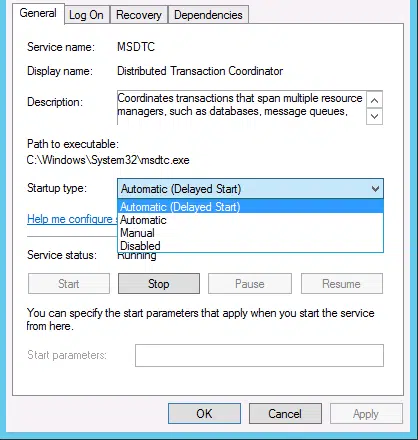
- You now have to click on the Apply tab and click on the Ok tab.
- After that, right-click the Print spooler service and choose Start.
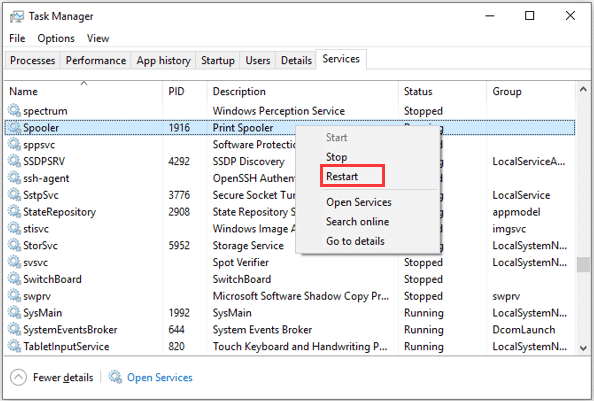
- This will let you save or email a PDF.
Method 4: Create a New Template or Form
- Here, you need to Create a new template for your form.
- Change the Template.
- Now, create your pdf.
Check Also: How to get rid of QuickBooks Error Code 12029?
Method 5: Restart and reset temp folder permissions
Step 1: Reboot the system
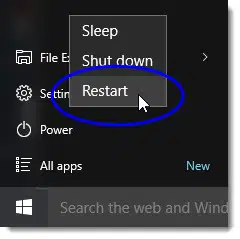
You need to restart your computer and then try to use the pdf feature again. If this doesn’t work, then reset your temp folder permissions.
Step 2: Reset Temp folder permissions
- At first, press the Windows + R tab to open the Run command.
- Now, enter in %TEMP% and click on Enter tab.
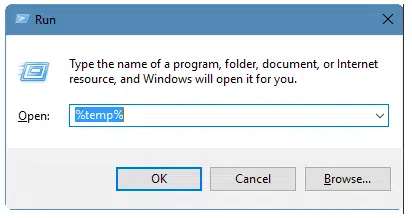
- You will then have to right-click the empty space and choose Properties.
- Go for the Security tab.
- Ensure all user names and groups in security have Full control.
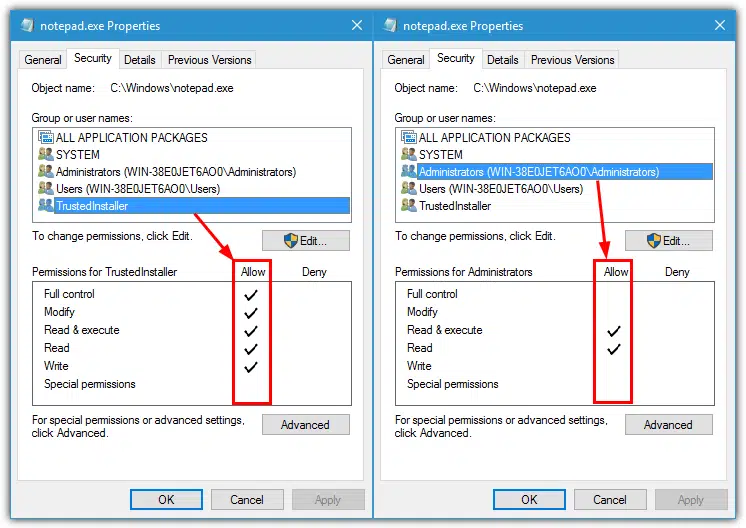
- After the permissions have been set to Full control, save as PDF again in QuickBooks.
Reconcile Windows disappears or doesn’t show
Well, if that is the case, or if QuickBooks locks up after you choose Reconcile from the Banking menu and the pdf function works, then the reconcile window might show off-screen. Here is what you need to do:
- Search for all open Windows to see if your reconcile window is listed.
- Now, choose Close all and begin the reconciliation again.
In case you continue to receive the same issue when reconciling the accounts, seek further assistance.
Method 6: Configure Microsoft XPS Document Writer v4.
- Under this process, press Start and go to Settings.
- After that move to Bluetooth and devices option.
- Select Printers and Scanners tab.
- Herein, click on the Add a printer or scanner option.
- Now add a local printer or network print with the Manual settings.
- Also, click on PORTPROMPT: (Local port) and click Next in the Use an existing port.
- Here you need to select Microsoft from the manufacturer list.
- Select Microsoft XPS Document Writer v4.
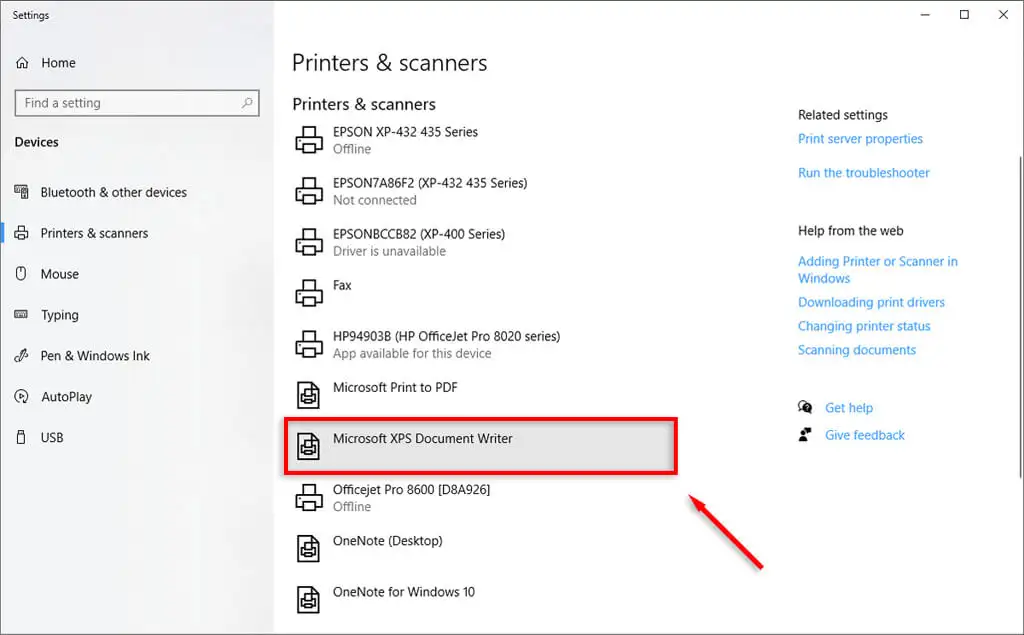
- Once done, select Next and Replace the current driver.
- Now again click on Next and Finish to save changes.
- Make sure to unmark the box next to make XPS the default printer.
For Windows 7/ Vista:
- Click on Devices and Printers option from the Start menu.
- select Microsoft XPS Document Writer.
- Here you need to click on Remove Device.
- Then, select Add a printer and click Add a local printer.
- Now you need to choose Use an existing port.
- Hit on XPS Port: (Local Port) and after that click on Next.
- Opt for Microsoft in the manufacturer list.
- Select Microsoft XPS Document Writer v4 and hit on Next.
- Choose the opt to Replace the current driver.
- Once done, hit on Next.
Check Also: How to Fix Issues When Deactivating Bank Feeds in QuickBooks?
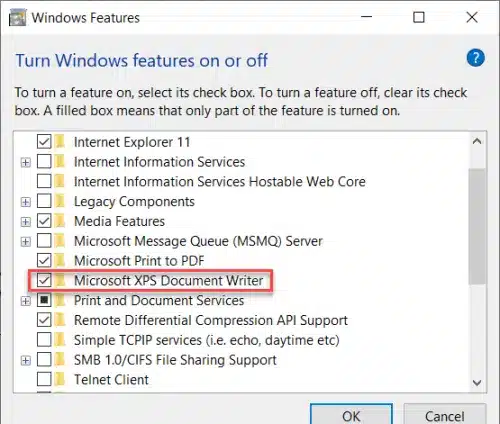
Method 7: Enable MS XPS Document Writer
- Open Programs and Features on your system.
- Then go to Turn Windows features on or off.

- Now enable MS XPS document writer. It will allow the XPS writer program to run smoothly.
Solution 8: Repair the Adobe Reader program
- Under this, click on Start < Control Panel < Programs and Features.
- After that select Adobe Reader, then Uninstall/Change, finally click Repair
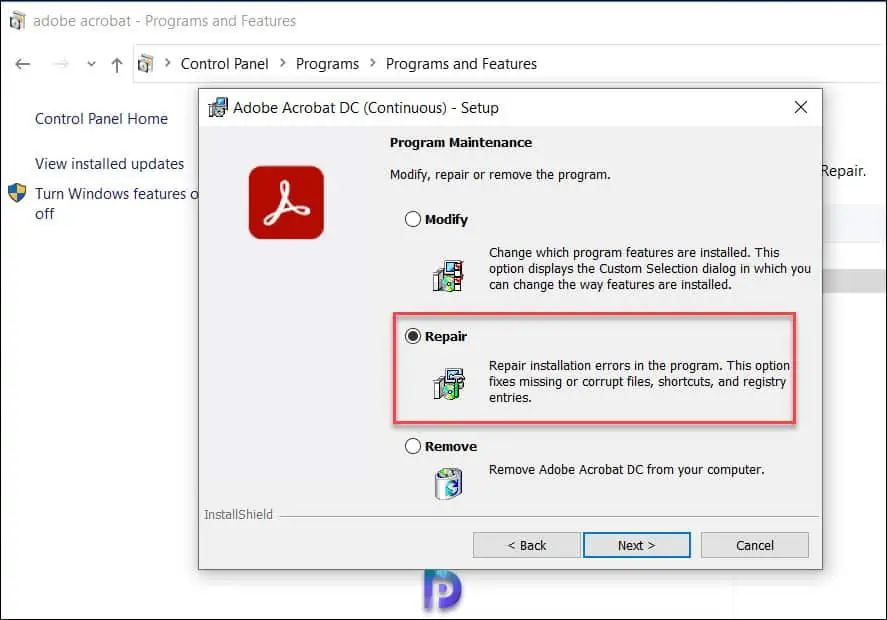
- When the repair is complete, double-check if the program runs properly.